Deploying a Image Recognition Service to AWS Lambda
Oct 10, 2024
7 min read

The source code is available in my repository.
Start a New Project
First, create an new virtual environment:
python -m venv ~/pyvenvs/lambdaI used venv for creating the environment, and I named it lambda and placed it in the ~/pyvenvs directory.
You may use any other environment manager and name as you wish.
I will name the project resnet-image-recognition:
mkdir resnet-image-recognitioncd resnet-image-recognitionThe Python packages we are going to use are
awslambdaricAWS need this package, the runtime interface client, to manage the interaction betweeen Lambda and our source code. See more details here. It will be used as the entry point of the container, as we will see later.pydanticMygo-toonly choice for defining data models.fastapi[standard]Framework for building APIs. Usestandardfeature here to install thefastapiCLI.mangumAn adapter for running ASGI applications in AWS Lambda. It is used to wrap our FastAPI app:Mangum(app).torchWe use PyTorch to define the ResNet50 model.torchvisionWe need utilities for transforming images before feeding them into the model.
Project structure:
resnet-image-recognition├── resnet_image_recognition│ ├── __init__.py│ ├── resnet│ │ ├── __init__.py│ │ └── ...│ └── image_recognizer│ ├── __init__.py│ ├── image_recognizer.py│ └── imagenet_classes.py├── app│ ├── __init__.py│ ├── app.py│ ├── auth│ │ ├── __init__.py│ │ └── validate_api_key.py│ └── handlers│ ├── __init__.py│ ├── health_check.py│ └── recognize_image.py├── models│ └── resnet50-0676ba61.pth├── api-keys.txt├── Dockerfile└── .gitignoreDefine the ResNet50 Architecture
When I was learning the ResNet, I found the original implementation is not that easy to understand. So, I implemented the ResNet model using PyTorch from scratch and add a lot of comments. Hope it will help you.
I put my source code for the ResNet in the sub-package resnet_image_recognition/resnet.
Check it here.
In this project, we will be using ResNet50.
To use the model for inference,
we also need the pretrained weights (.pt or .pth files).
You can download the one provided by PyTorch from here.
Save it under the model directory.
Implement the ImageRecognizer using the ResNet50 Model
We are now going to create a simple ImageRecognizer class powered by the ResNet50 model.
It has a recognize method, which takes a PIL image as input and returns the class of that image.
from pathlib import Pathfrom PIL import Image as imimport torchfrom torchvision import transformsfrom ..resnet import ResNet50from .imagenet_classes import IMAGENET_CLASSES

class ImageRecognizer:
    def __init__(self, model_path: Path) -> None:
        # Load the state dict        state_dict = torch.load(model_path)
        # Create an empty model        self._model = ResNet50()
        # Set the pretrained weights        self._model.load_state_dict(state_dict)
        # Set evaluation mode        self._model.eval()
    def recognize(self, image: im.Image) -> str:        """        Recognizes the class of an image.
        Parameters        ----------        image : Image            The input image.
        Returns        -------        str            The name of the class of the given image.        """
        # Resize the image        resized_image = transforms.Resize((224, 224))(image)
        # Convert to tensor        image_tensor = transforms.ToTensor()(resized_image)
        # Add batch dimension        image_tensor = torch.unsqueeze(image_tensor, 0)
        # Run inference        # The probabilities for each class are returned        probs = self._model(image_tensor)
        # Find the class with the highest probability        class_index = torch.argmax(probs).item()
        # Get the class name        class_name = IMAGENET_CLASSES[class_index]
        return class_name
The constant IMAGENET_CLASSES is a tuple consiting of 1000 classes from the ImageNet dataset.
You may check its value here in my repository.
Build a FastAPI App — Deliver the Deep Learning Model as an HTTP Service
The core functionality of the service is done.
To let other users to use our ImageRecognizer, we need create an API that handles users’ requests and invokes the ImageRecognizer as a backend service.
Every FastAPI app reqires a global app instance to be defined.
from fastapi import FastAPI
# Create an app instanceapp = FastAPI()
As a standard procedure, we expose the app instance in the __init__.py:
from .app import app
__all__ = [    "app",]
However, we are not going to use this app (directly) in this project.
But for a general FastAPI project, this is what we need.
For this project, as you will see,
we will wrap the app further with a Mangum adapter in a later section.
Health Check
To get started, first create a health_check API, which simply returns a short message indicating that the server is up and running.
(health_check is the Hello, World API in the backend development.)
def health_check():
    return {        "message": "I am ok",    }
Function like health_check defined above are oftern referred to as handlers since they handle the incoming requests.
Next, register a route for the health_check:
from fastapi import FastAPIfrom .handlers import (    health_check,)

# Create an app instanceapp = FastAPI()
# Register routesapp.get("/health-check")(health_check)
app.get specifies that the request method is GET.
For POST methods, use app.post.
Recognize Image
import iofrom pathlib import Pathfrom PIL import Image as imfrom pydantic import BaseModelfrom fastapi import UploadFile
MODELS_DIR = Path.cwd().joinpath("models")MODEL_PATH = MODELS_DIR.joinpath("resnet50-0676ba61.pth")

class RecognizeImageResponse(BaseModel):    class_name: str

async def recognize_image(    image: UploadFile,) -> RecognizeImageResponse:
    # Read the image    image_bytes = await image.read()
    # Create a byte stream from the raw bytes    image_byte_stream = io.BytesIO(image_bytes)
    # Open the image    image = im.open(image_byte_stream)
    from resnet_image_recognition import ImageRecognizer
    # Create the image recognizer    image_recognizer = ImageRecognizer(MODEL_PATH)
    # Recognize    class_name = image_recognizer.recognize(image)
    return RecognizeImageResponse(class_name=class_name)
Register a route for the recognize_image:
from fastapi import FastAPIfrom .handlers import (    health_check,    recognize_image,)

# Create an app instanceapp = FastAPI()
# Register routesapp.get("/health-check")(health_check)app.post("/recognize-image")(recognize_image)
Final Touch — Mangum Adapter
Wrap the app instance into the Mangum adapter:
from fastapi import FastAPIfrom .handlers import (    health_check,    recognize_image,)

# Create an app instanceapp = FastAPI()
# Register routesapp.get("/health-check")(health_check)app.post("/recognize-image")(recognize_image)
# Wrap the app instance into the Mangum adapterhandler = Mangum(app)
Expose the variable handler in __init__.py, which will be used as the entrypoint of the container.
The service will be started via app.handler.
from .app import appfrom .app import app, handler
__all__ = [    "app",    "handler",]
Write a Dockerfile for Building the Image
# Base imageFROM --platform=linux/amd64 python:3.11

# Copy files
# Copy the package sourceCOPY ./resnet_image_recognition ./resnet_image_recognition
# Copy the FastAPI app sourceCOPY ./app ./app
# Copy model weightsCOPY ./models ./models
# Copy API keysCOPY ./api-keys.txt .

# Install dependencies
# Install dependenciesRUN pip install awslambdaric pydantic "fastapi[standard]" mangum
# Install PyTroch for LinuxRUN pip install torch torchvision --index-url https://download.pytorch.org/whl/cpu

# Set runtime interface client as default command for the container runtimeENTRYPOINT [ "/usr/local/bin/python", "-m", "awslambdaric" ]
# Pass the name of the function handler as an argument to the runtimeCMD [ "app.handler" ]
You can build and tag the image now if you are familiar with Docker. Or, you can check the next section for how to build and push the image to AWS ECR.
Build and Push the Docker Image to AWS ECR
ECR (Elastic Container Registry) is an AWS service that you can store, share and deploy container images.
When deploying an AWS Lambda function using Docker images, you are prompted to choose an image from the ECR.
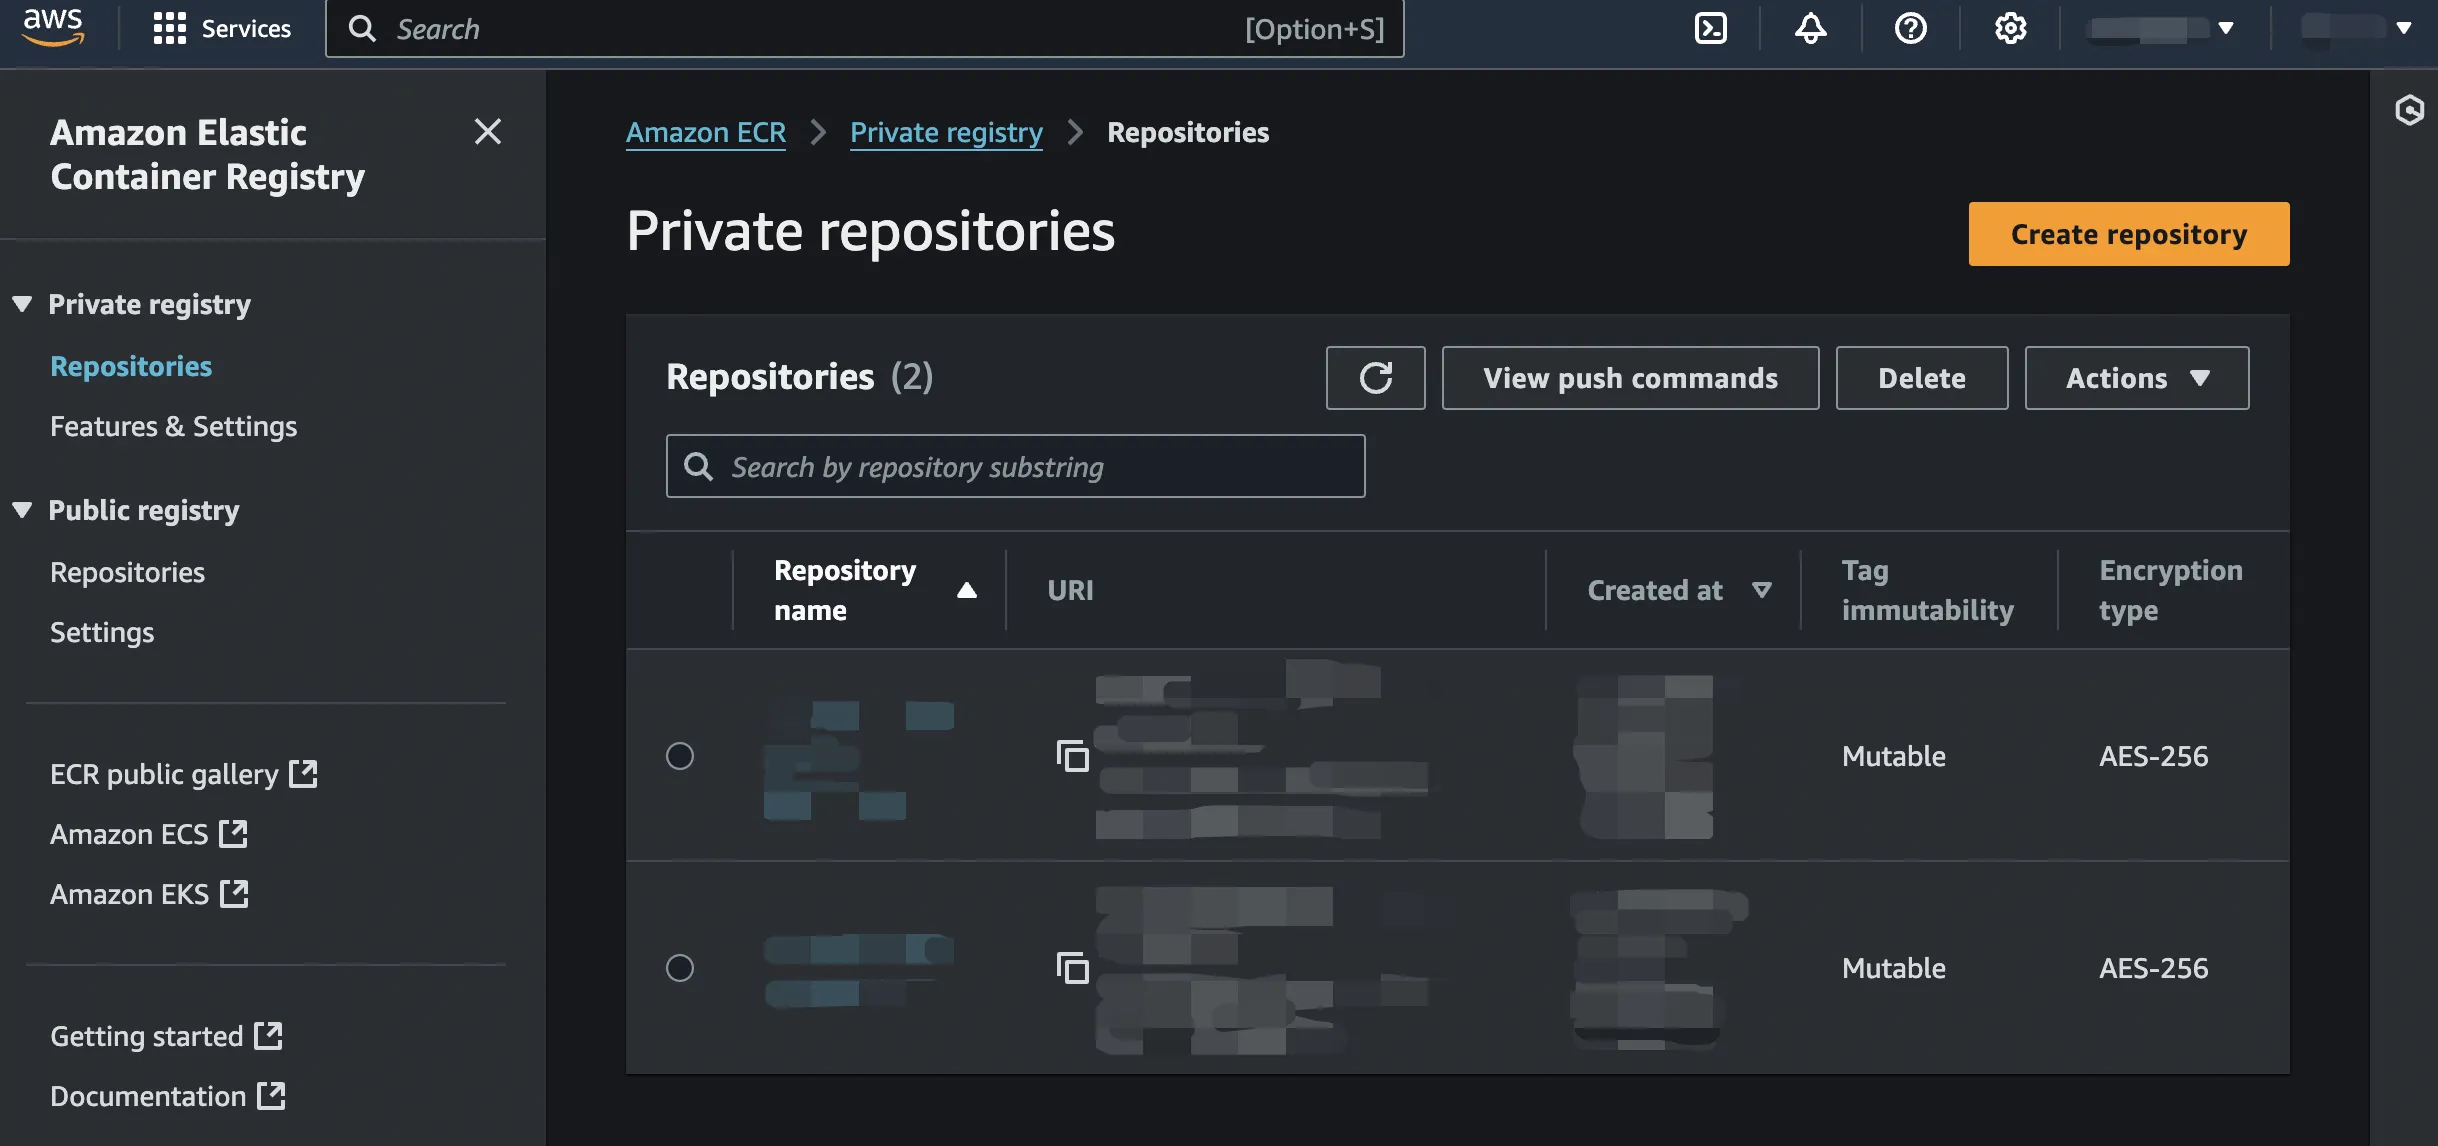
Enter the ECR console, you will see the following UI. Click Create repository and following the instructions.
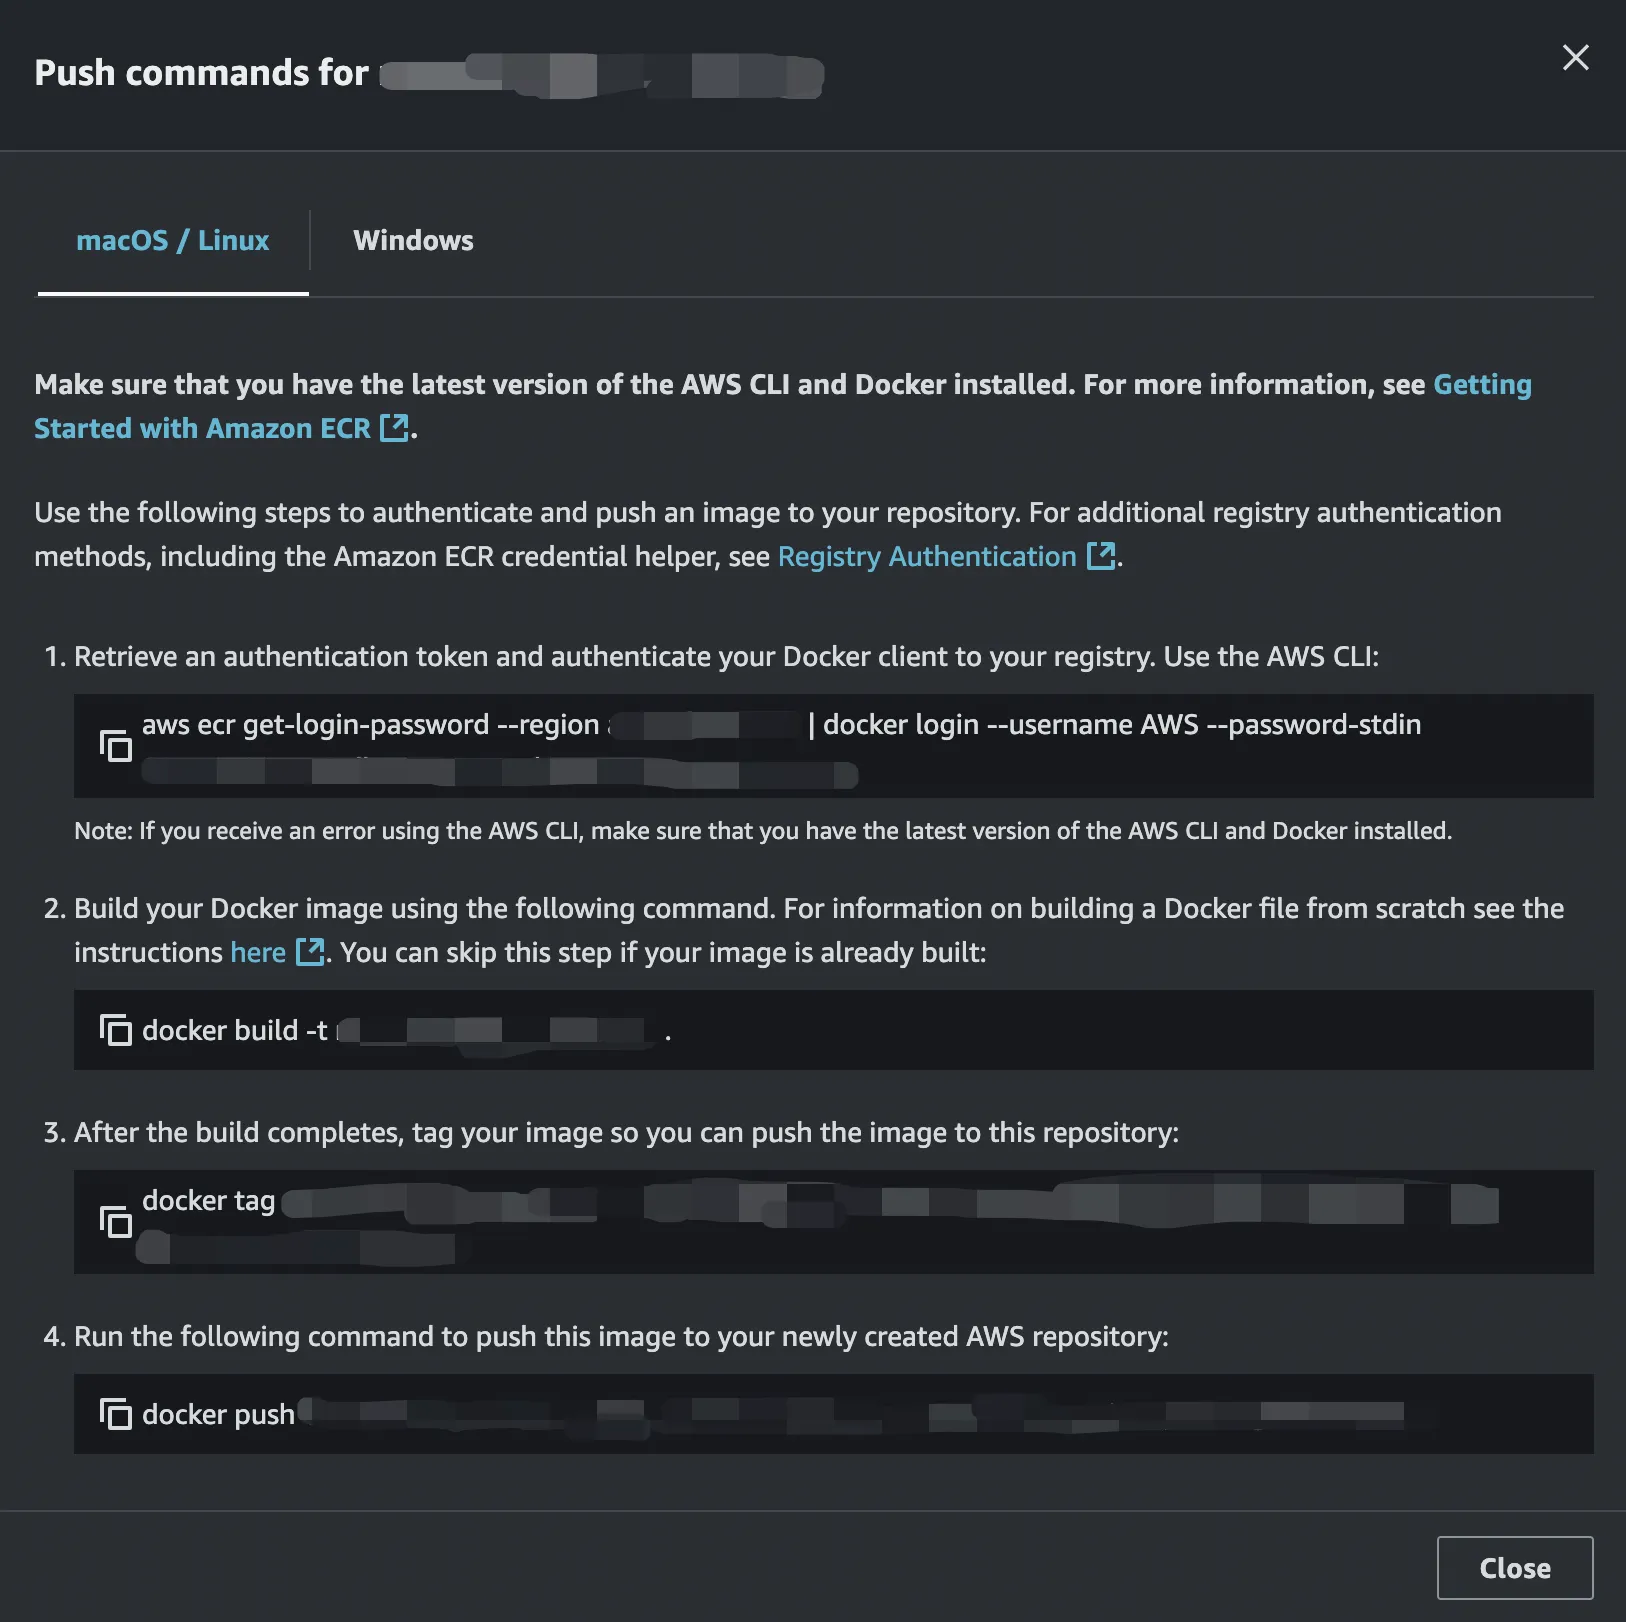
After that, click the link to the repository you have created and then click the View push commands button to see the help messages like the following for building and pushing Docker images to ECR.
Create a Lambda Function using the Docker Container
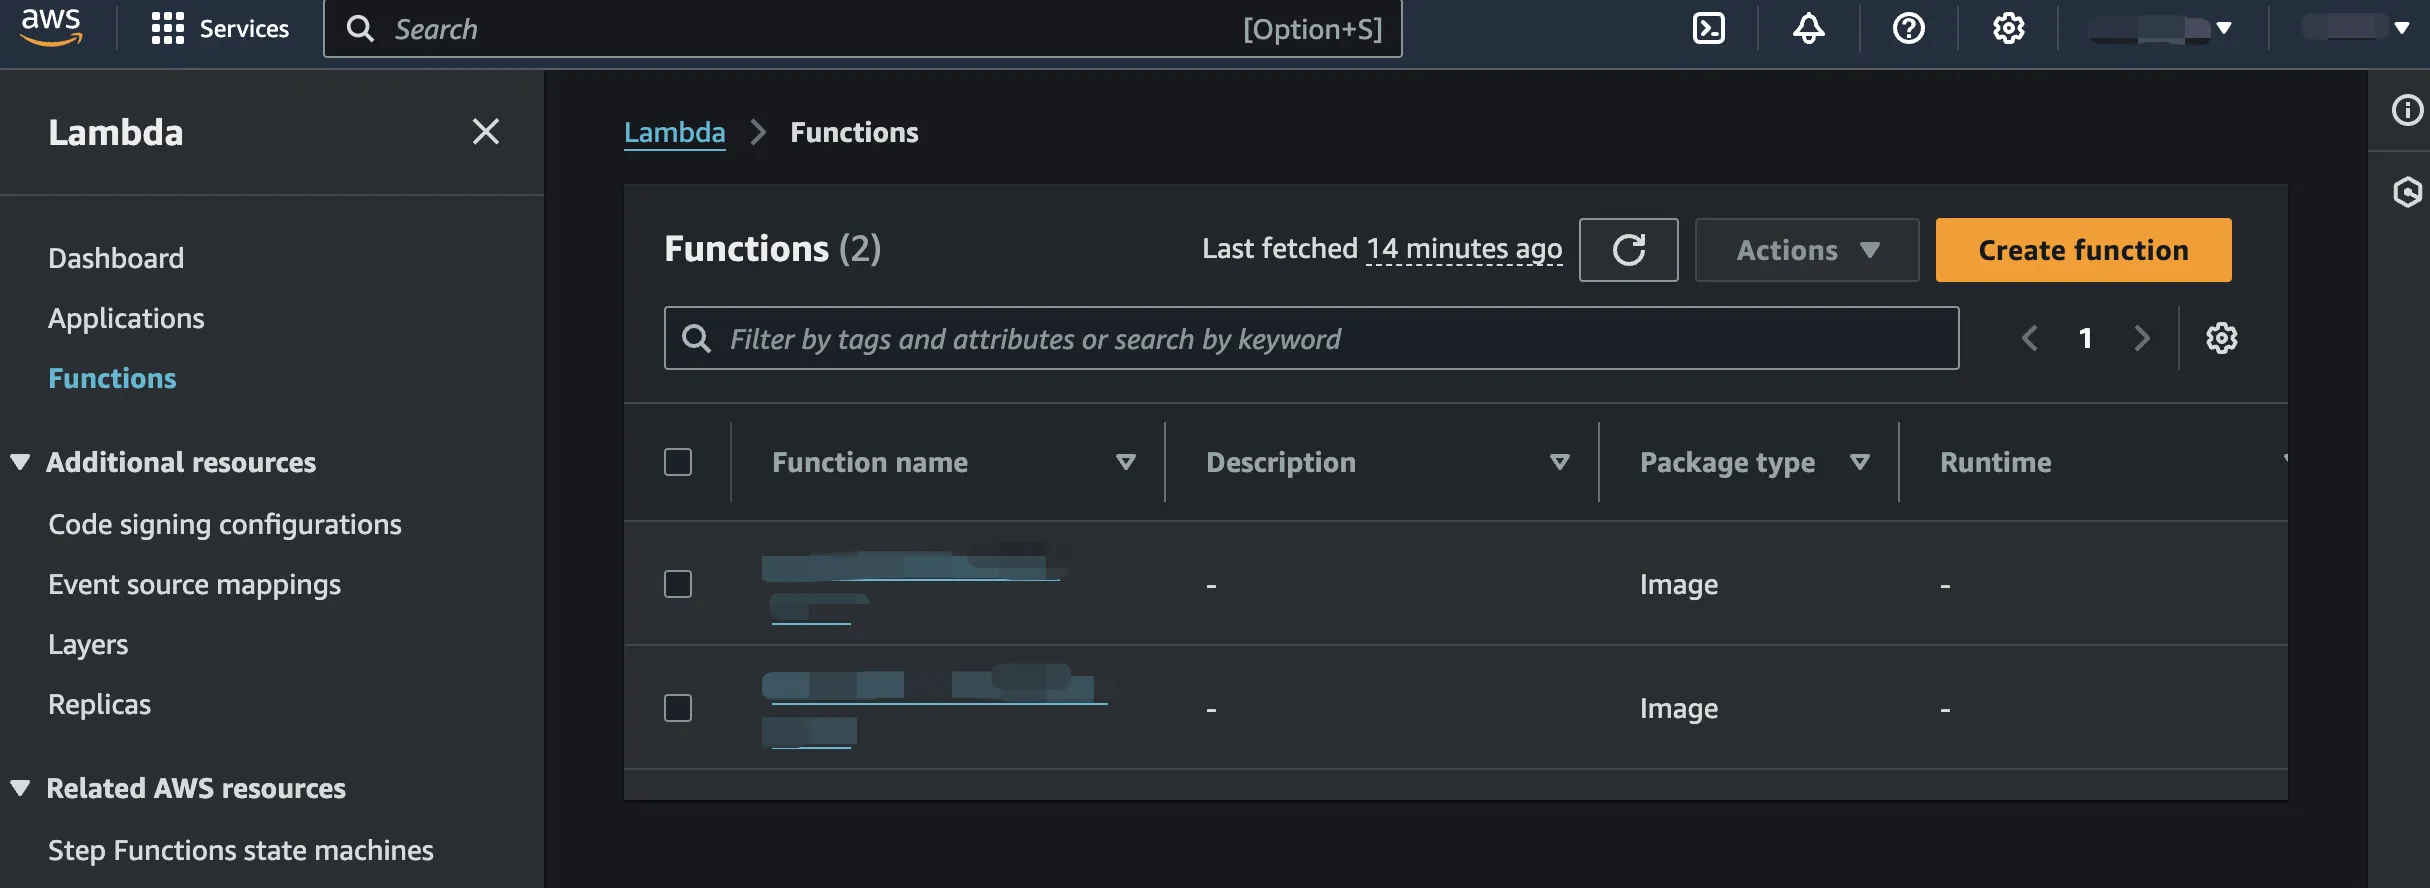
Enter the AWS Lambda console and click Create function:
Choose Container image and click Browse image to select the previously uploaded image from ECR.
Recall that we set the linux/amd64 platform for the container image. So, here choose the x86_64 architecture.
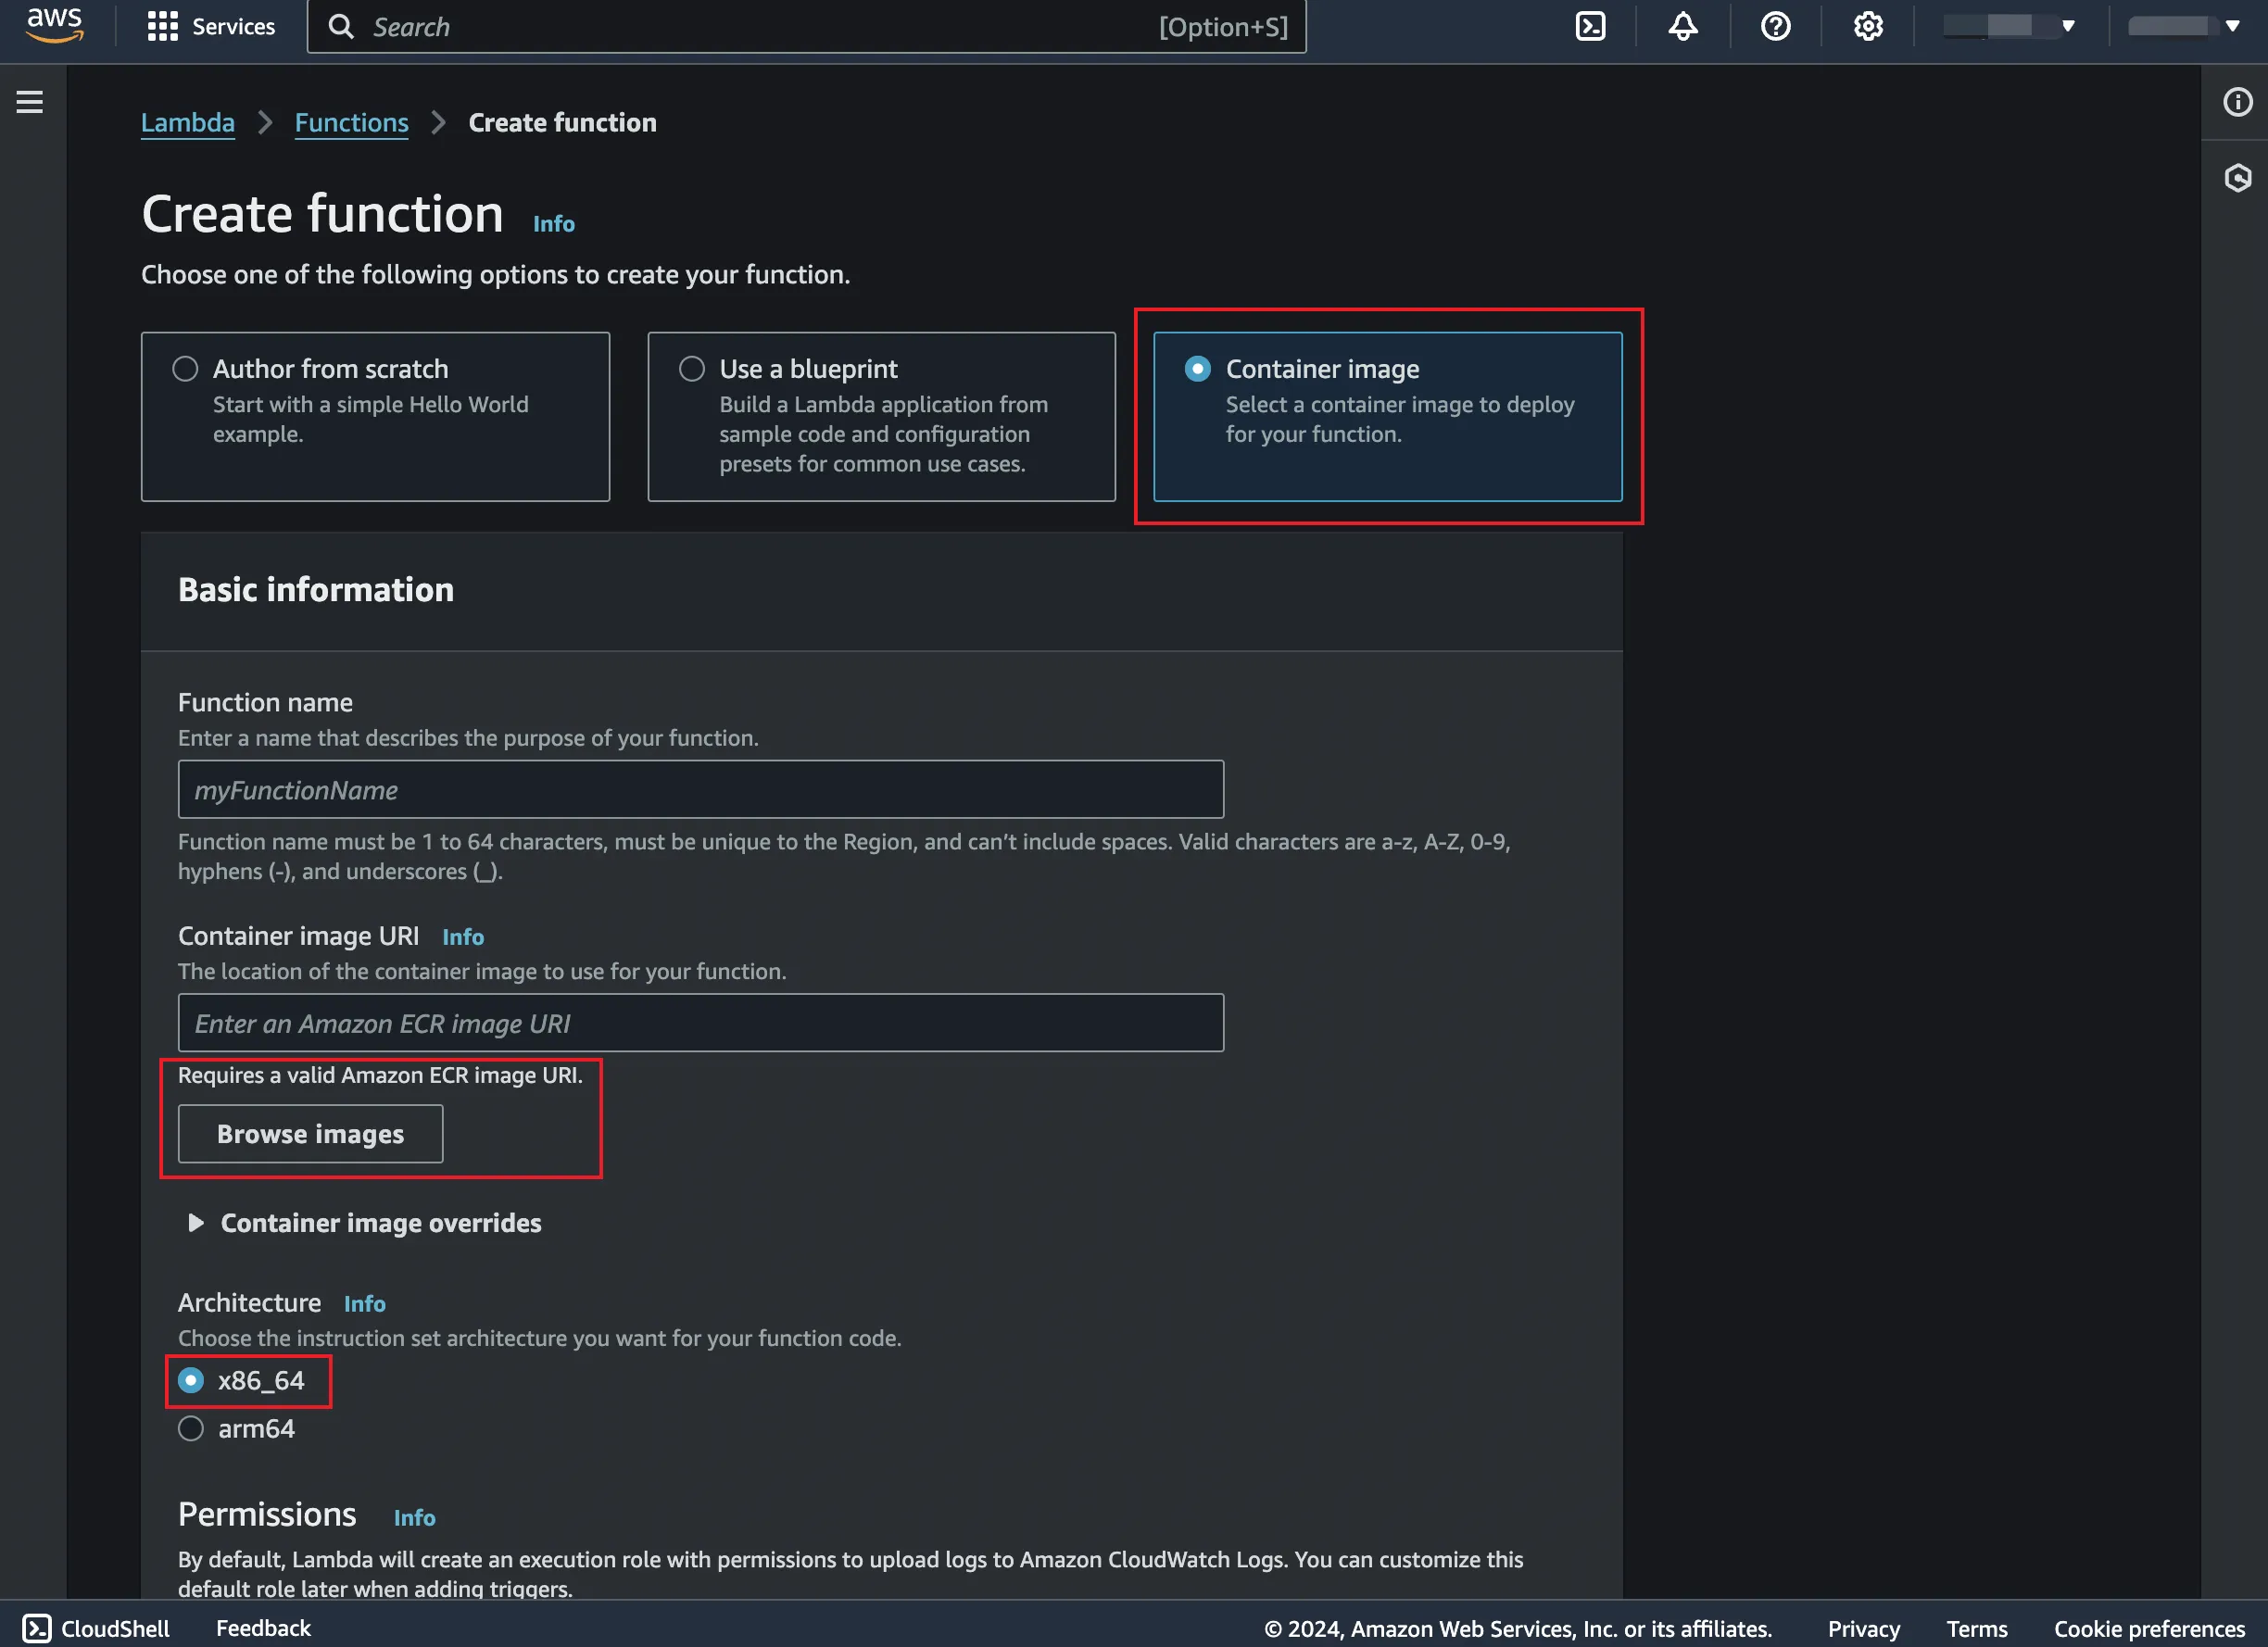
Then click Create function and wait for it.
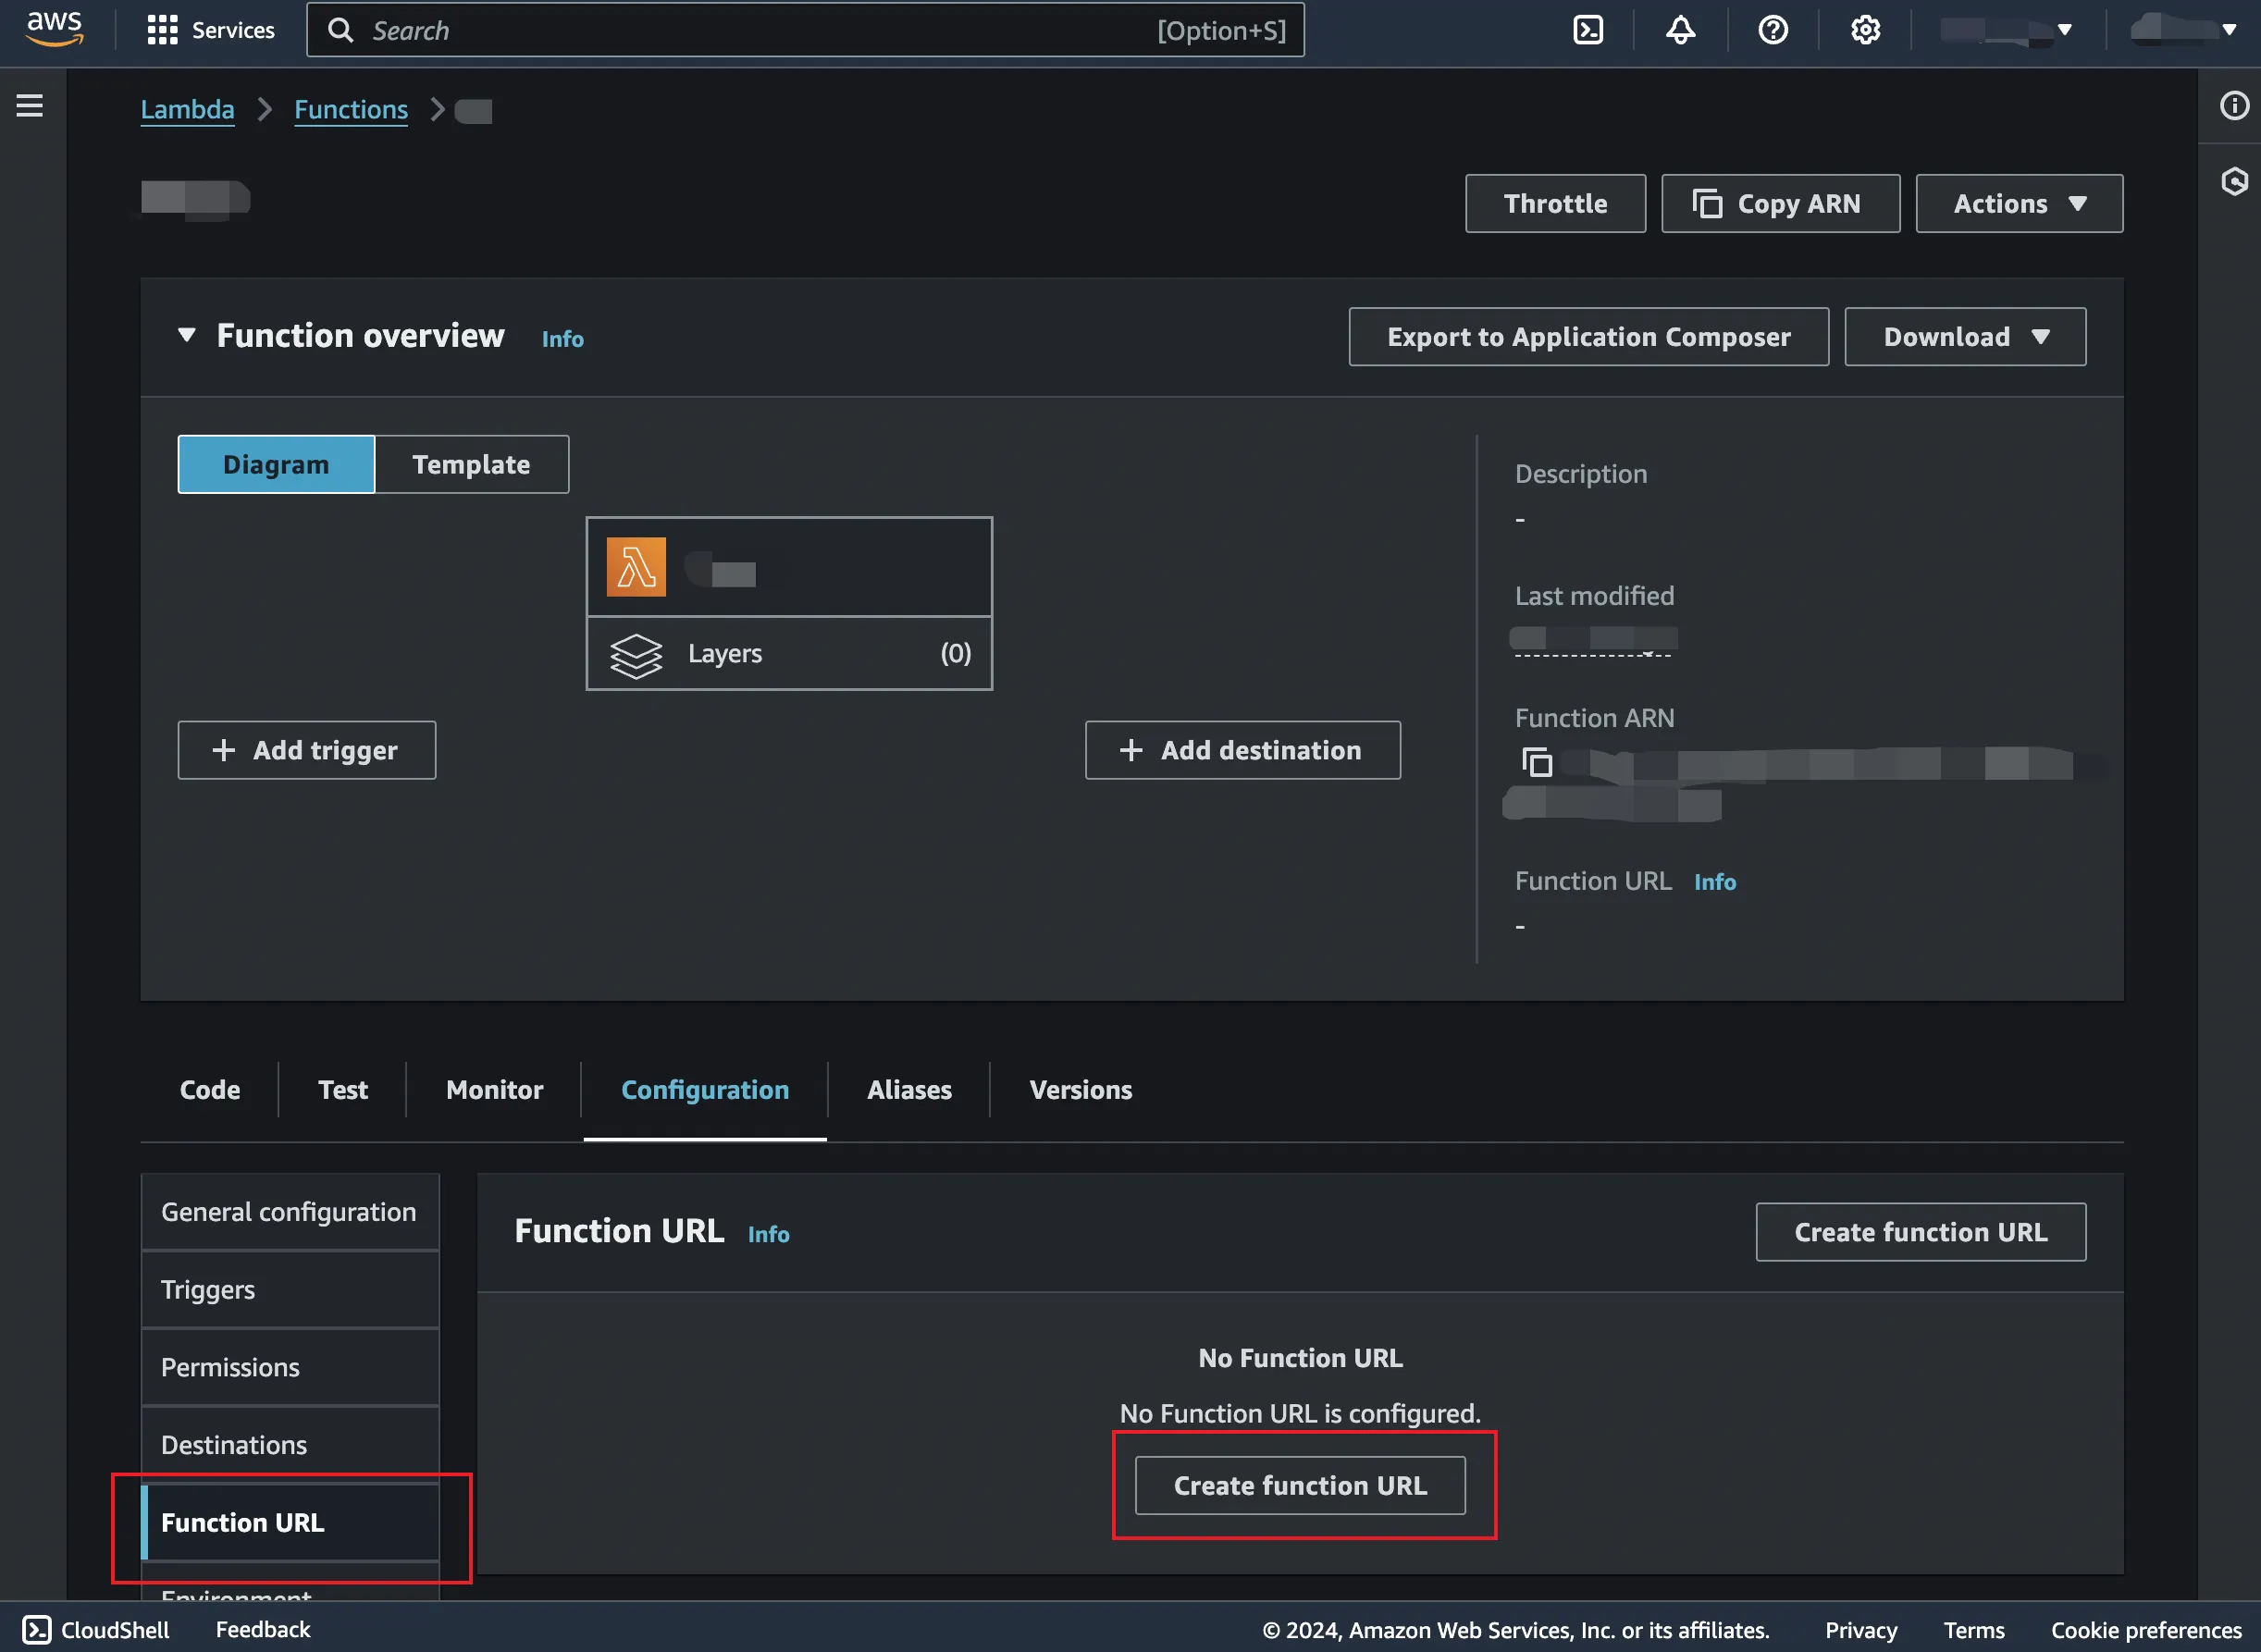
Create a Funciton URL
Now, your funciton can only be invoked for authenticated AWS users or you other AWS services.
To make it accessible for all users via HTTP requests, you need to generate a function URL.
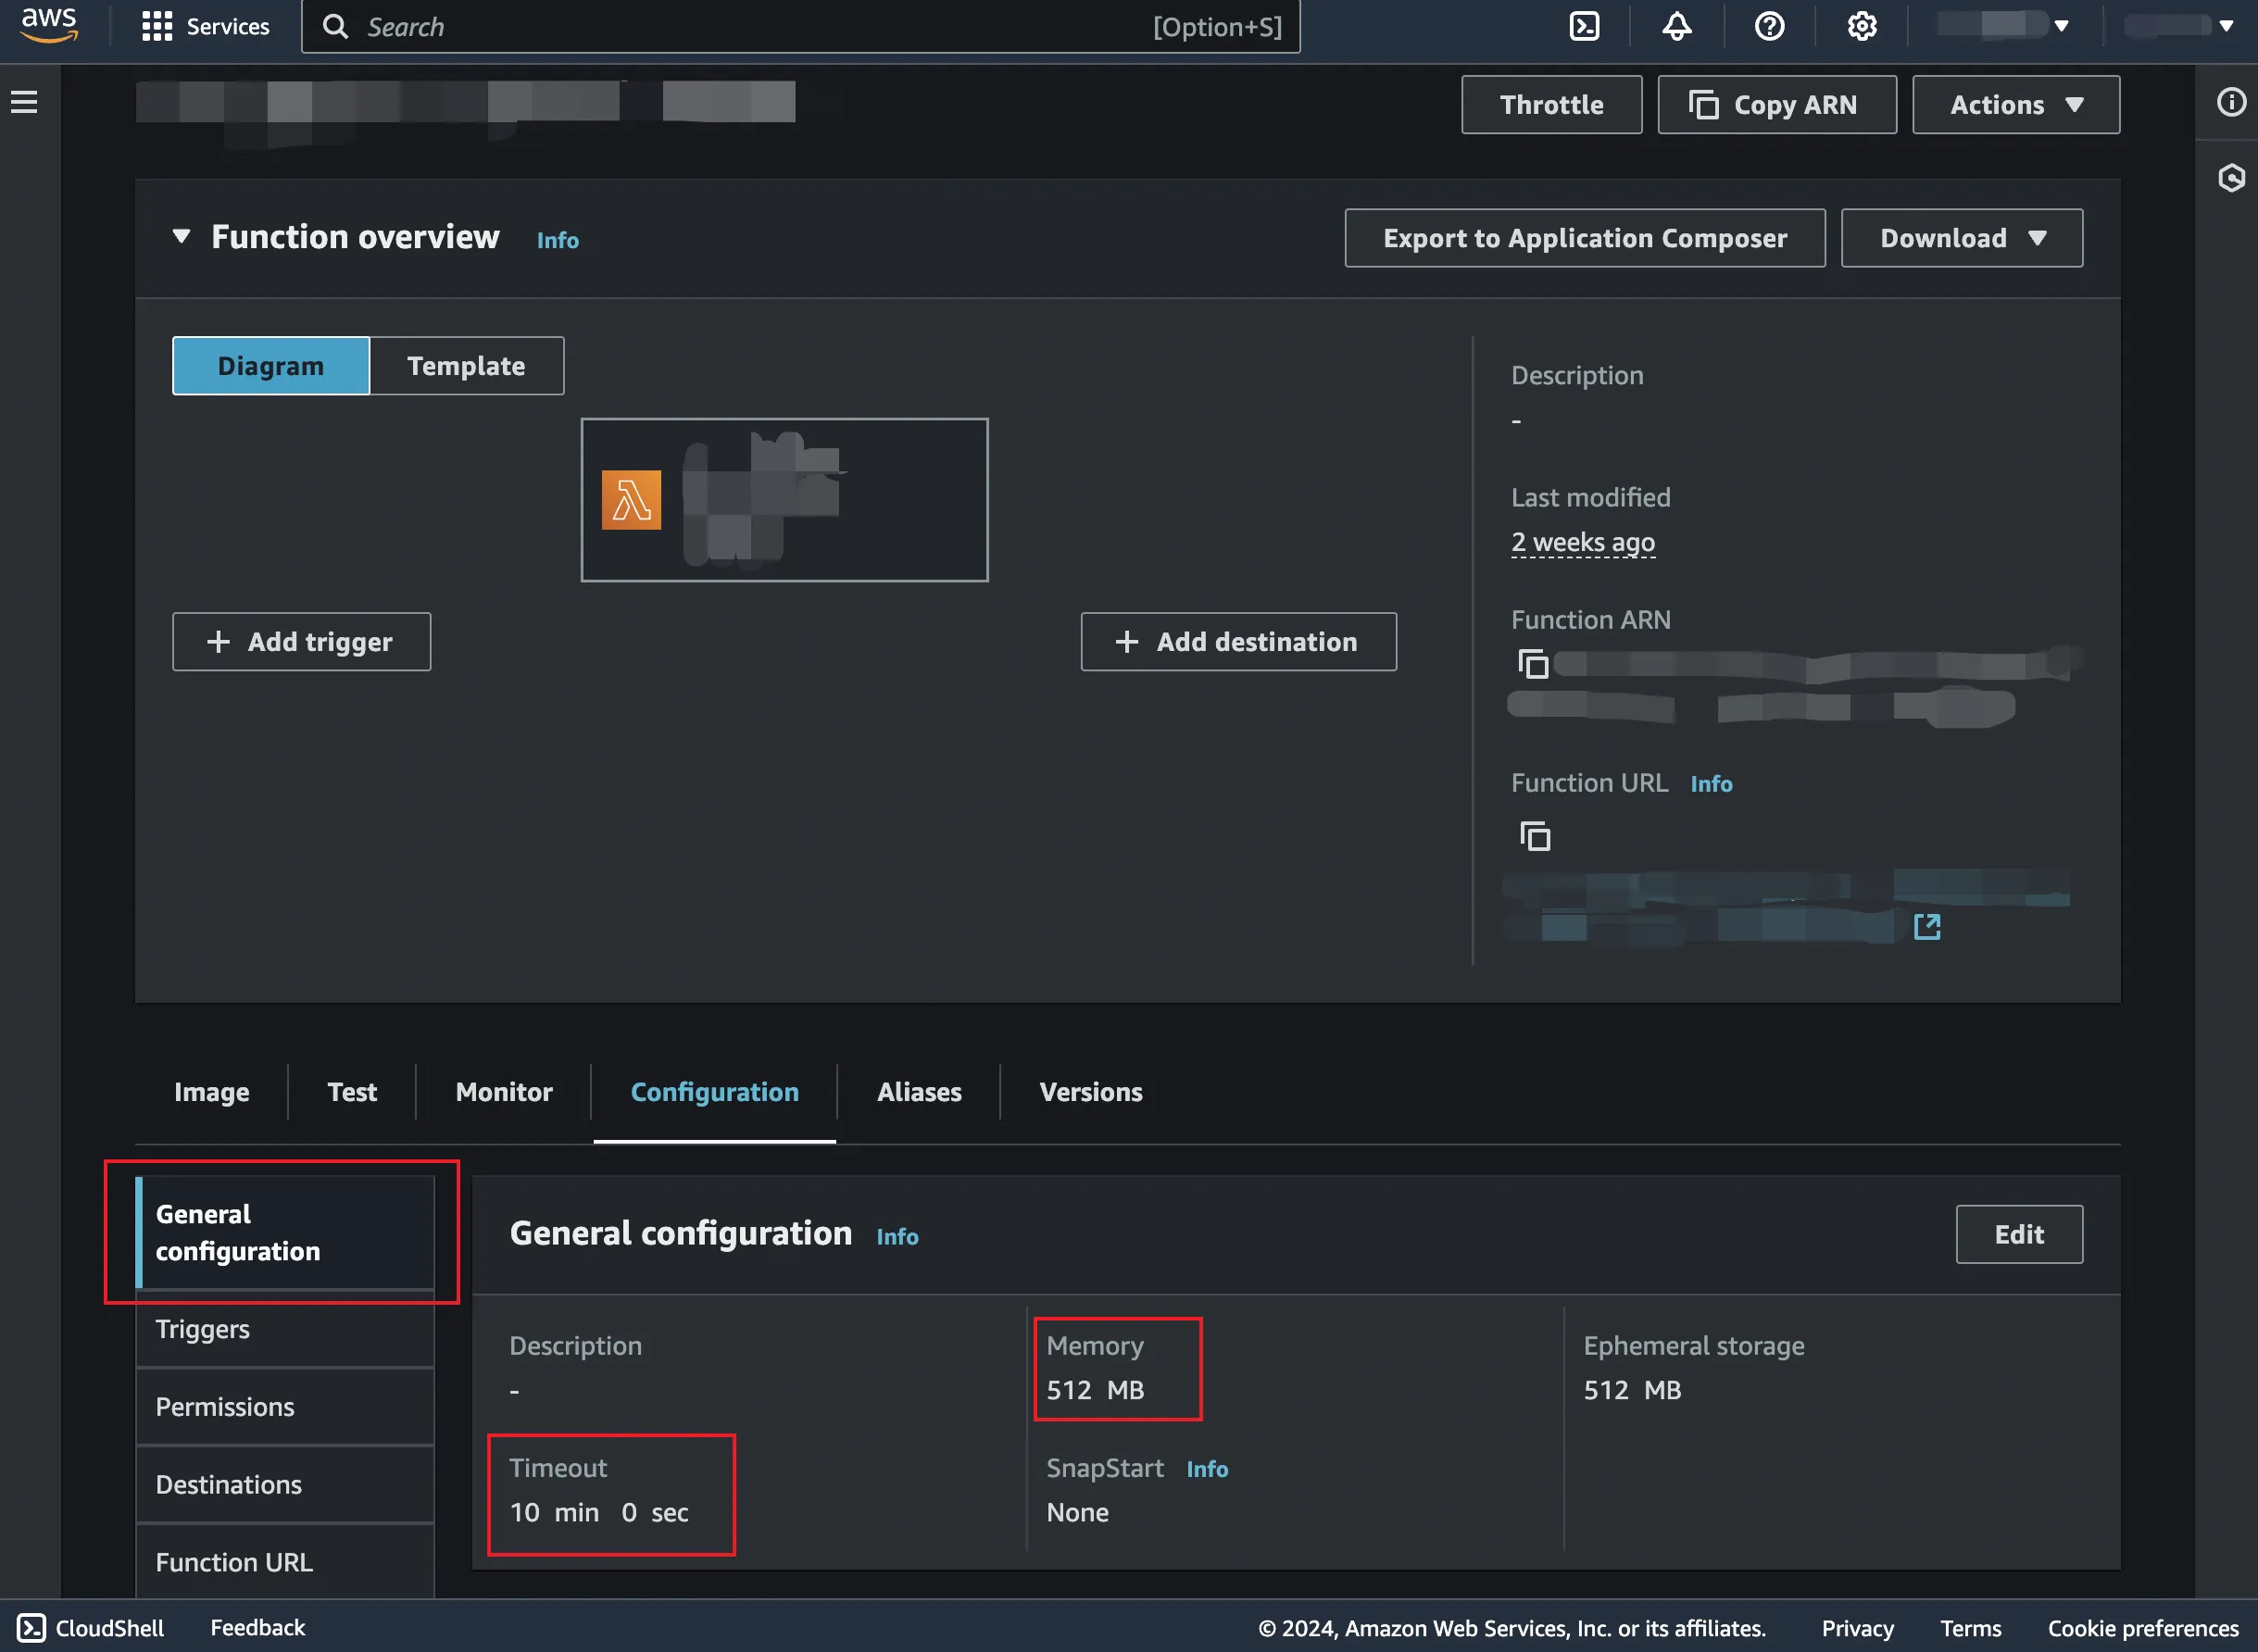
Set General Configuration
When you invoke the function now, you will possibly encounter the errors of timeout or out of memeory. This is because of the limited resources assigned to the cloud function.
You may assign more resources like time limit and memeory usage by setting the following configuration:
Comments 💬